
 Author:
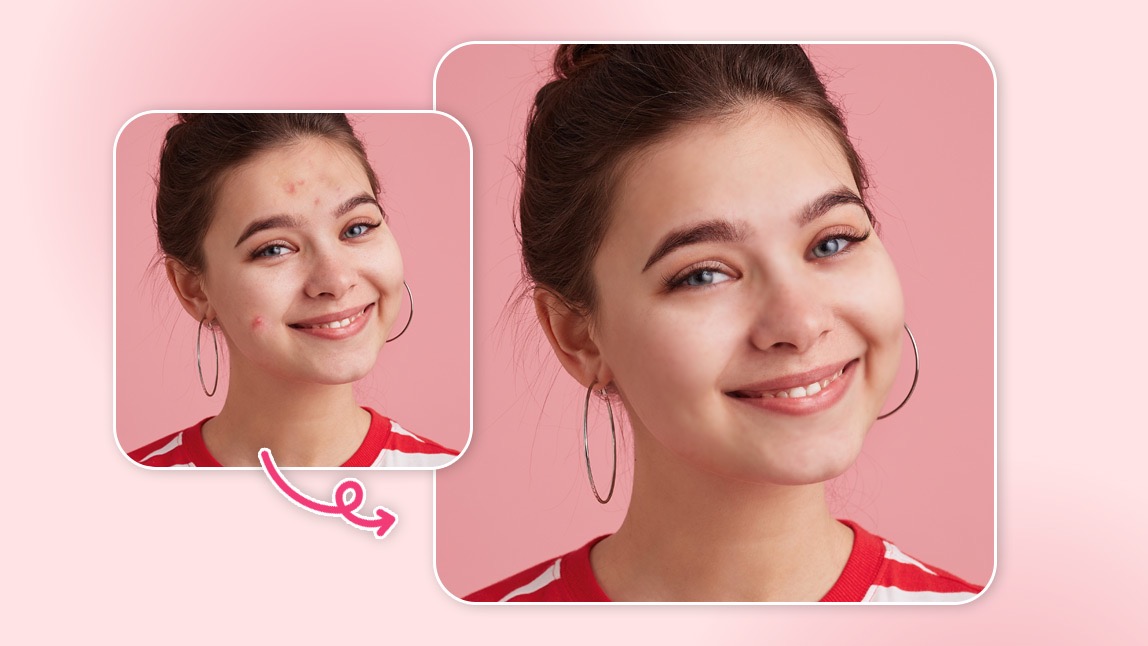
If there’s one universal truth in the age of selfies, it’s this: pimples always show up precisely when you don’t want them to.
Fortunately, you don’t need to scrap your photos because of a rogue pimple. Thanks to today’s smart mobile editing tools, it’s easier than ever to remove pimples from photos while still looking like yourself.
And no, this doesn’t mean blurring your whole face into oblivion. You can actually clear your skin in pictures while keeping every natural detail intact, pores included.
Why Do Pimples Look So Much Worse in Photos?
 Ever noticed how a tiny blemish somehow becomes the star of the show the moment a camera is involved? Blame it on high-resolution lenses and lighting, especially overhead lighting, which is basically acne’s personal spotlight.
Pictures magnify texture, shadows, and redness. That’s why even a small bump looks ten times bigger in your camera roll.
But the good news? Digital tools now correct those tiny flaws just as quickly as they appear.
How to Remove Pimples From Photos: Step-by-Step Guide
This is your no-fuss, universal method for smoothing skin, clearing acne, and freshening your selfies, all without editing skills.
Step 1: Download YouCam Makeup (Free)
Head to the App Store or Google Play and search YouCam Makeup. It’s fast and perfect for on-the-go edits.
Step 2: Go to Face Retouch
 Tap Face Retouch. This is where the magic happens.
The app’s pimple remover editor sits inside this menu, making it super easy to find and use.
Step 3: Upload a Photo — or Snap One in Real Time
You can pick any existing selfie from your gallery, or open the in-app camera to capture a fresh one.
Step 4: Choose “Spots” or “Blemish”
 Here’s where you actually remove pimples from the photo:
- Spots targets small acne marks, minor imperfections, and redness.
- Blemish handles bigger breakouts or noticeable texture.
Step 5: Select Auto or Manual Mode
 YouCam Makeup gives you two ways to clear your skin:
- Auto Mode: The app automatically detects acne and removes it in one tap. Perfect if you want instant results with zero fiddling.
- Manual Mode: Tap individual pimples yourself for precise retouching. Ideal when you want full control.
Step 6: Add Any Other Enhancements
Once the pimples are gone, feel free to explore subtle tweaks:
- Smooth uneven skin tone
- Brighten under-eyes
- Sharpen details
- Add gentle lighting
- Enhance lips or brows for a polished selfie
These extras are optional, but they can elevate a good photo into a great one.
Step 7: Save and Share!
Once you're happy with your look, tap Save. Share your flawless selfie anywhere you want.
Why Natural Retouching Is the New Standard
Long gone are the days of overly edited, blurry selfies. Today’s users want authenticity: photos that look fresh, confident, and real.
The goal isn’t to transform your face; it’s to get rid of a temporary breakout that doesn’t define you.
That’s why tools like YouCam Makeup’s pimple remover editor are so loved. You don’t lose your freckles. You don’t lose texture. You simply lose that one blemish that’s stealing attention.
Tips for Clearer Selfies (Even Before Editing)
Want to reduce the need for editing altogether?
Use these quick hacks:
1. Use Soft, Diffused Light
Natural light is your best friend, especially during golden hour. Harsh light creates shadows that amplify texture.
2. Keep Your Camera Lens Clean
A tiny fingerprint can distort your skin tone in weird ways. A two-second lens wipe can save your entire camera roll.

3. Know Your Angles
Angles can dramatically minimize or emphasize skin texture. Shooting slightly above eye level tends to be the most flattering.
4. Don’t Zoom
Zoom lowers image quality and exaggerates flaws. Step closer instead! Even with perfect lighting and angles, pimples happen, which is why having a trustworthy pimple remover editor is essential.
Get a Photo You Love with YouCam Makeup
A breakout shouldn’t be the reason you hide from the camera. Whether you're prepping a professional headshot, taking a cute brunch selfie, or documenting a milestone moment, you should be able to share photos you feel good about.
With YouCam Makeup, it takes just seconds to remove pimples from photos, retouch your skin naturally, and present your best self, without filters that erase your identity.
Download YouCam Makeup today on iPhone or Android, and see how easy, fast, and natural blemish removal can be. One tap, one edit, all the confidence.
Remove Pimples From Photo FAQs
How to remove pimples on a photo?
You can remove pimples from a photo using a pimple remover editor like YouCam Makeup. Just upload your picture, open the Retouch tool, and tap the pimples you want to erase. The app smoothes spots instantly while keeping natural skin texture, so your face looks clear without looking overly edited.
How to remove pimples from photo on iPhone?
To clear a pimple on iPhone, download YouCam Makeup from the App Store. Import your photo, tap Beautify → Retouch, then choose Spots or Blemish. Use Auto mode for one-tap removal or Manual mode for precise edits. Save your image when finished. It’s the quickest, most natural way to fix acne in iPhone photos.
What is the app that removes pimples?
YouCam Makeup is one of the most popular apps for removing pimples. Its AI-powered pimple remover editor detects acne, bumps, and redness automatically and clears them with a single tap. You can also manually edit specific spots for perfect precision. Available on both iPhone and Android, it delivers natural-looking results in seconds.
How to make skin clear in a picture?
To make skin look clear in a photo, use an editing app with skin-retouching tools. In YouCam Makeup, open your photo, go to Beautify → Retouch, and apply Smooth, Tone, or Blemish corrections. These tools even out texture, reduce redness, and brighten skin while keeping it natural. Save your edited image once you’re satisfied.
Which app is best for face smoothing?
YouCam Makeup is widely considered one of the best apps for face smoothing. Its Smooth tool softens texture without blurring details, so your skin stays natural and realistic. You can adjust the strength for subtle or more polished results. It’s available on both iPhone and Android and ideal for selfies, portraits, and social media photos.


