


 Author:
 ![How to Make a Filter: Makeup, Face, and More [2026]](https://plugins-media.makeupar.com/smb/blog/post/2026-09-02/webp_2ddc014c-00a7-40bb-b0c7-97313fbe0bc3.jpg)
Everyone wants to make a filter, but ask five people what a "filter" is and you'll get five answers: a color preset for your photos, a TikTok effect that puts a cat nose on your face, a skin-smoothing slider, an AI edit, or a virtual lipstick try-on. They sound alike, but they're built with completely different tools. And in 2026, one of the most popular tools, Meta Spark, no longer exists.
This guide is written for complete beginners. You'll first figure out which kind of filter you actually need, then follow click-by-click steps to make it. It covers photo presets, makeup filters, face filters, AI filters, and the try-on filters brands put on their own websites.
What Does "Make a Filter" Mean in 2026?
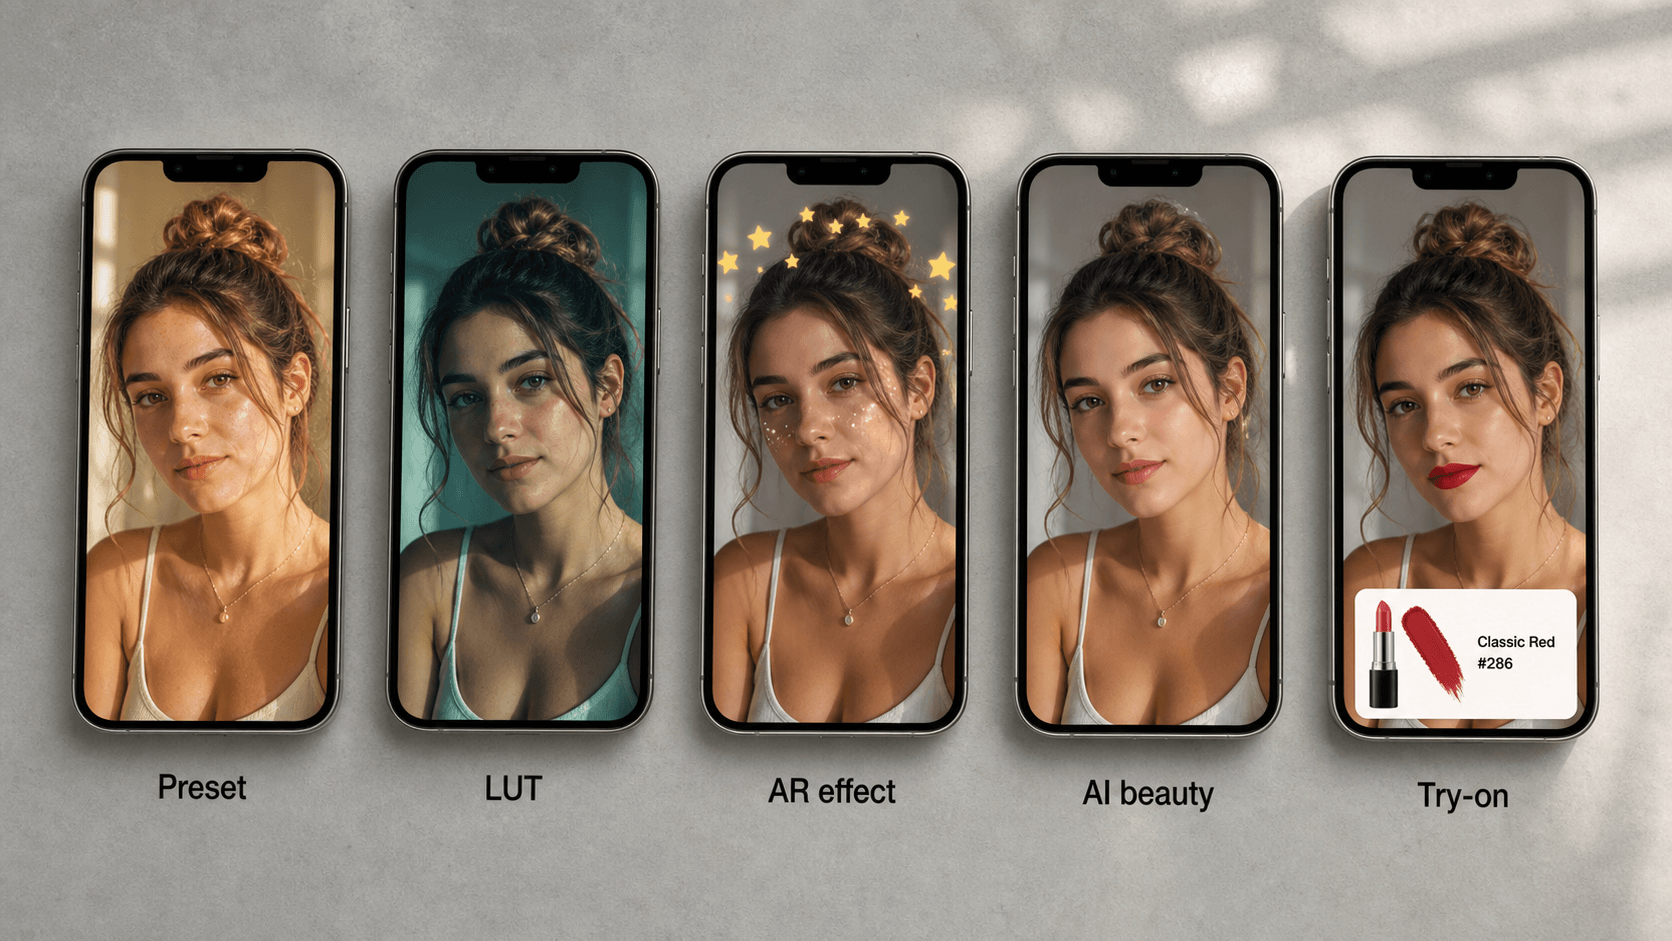
"Filter" is one word for five different things. Knowing which one you want saves you from downloading the wrong software.
| What people call it | What it really is (in plain words) | Where it works |
|---|---|---|
| Photo filter / preset | Your photo edits (brightness, color, contrast) saved as one button | Photos you've already taken |
| Video filter / LUT | The same idea for video: a color recipe file you apply to footage | Videos you've already shot |
| AR face effect | An image or 3D object that sticks to your face and follows it as you move | Live camera in TikTok or Snapchat |
| AI beauty filter | AI that retouches skin, reshapes, or restyles a photo | Photo, video, or live |
| Branded try-on filter | A real product shade (like a specific lipstick) shown on your face | A brand's own website, app, or in-store screen |
A simple way to remember it: a preset is a look, an AR effect is entertainment, and a try-on filter is a shopping tool. Only the last one connects to a real product and a "Buy" button.
Quick glossary (you'll see these words below):
- Face tracking: the technology that finds your face in the camera and follows it in real time.
- Opacity: how strong or see-through an effect is. 100% is full strength; 40% is subtle.
- Finish: how a makeup product reflects light: matte (flat), satin (soft sheen), gloss (shiny), or shimmer (sparkly).
- Occlusion: hiding parts of an effect when something is in front of them, like the arm of a pair of glasses disappearing behind your head.
- API: a way for a website or app to "borrow" another company's technology, such as a ready-made makeup try-on engine.
Which Kind of Filter Should You Make?
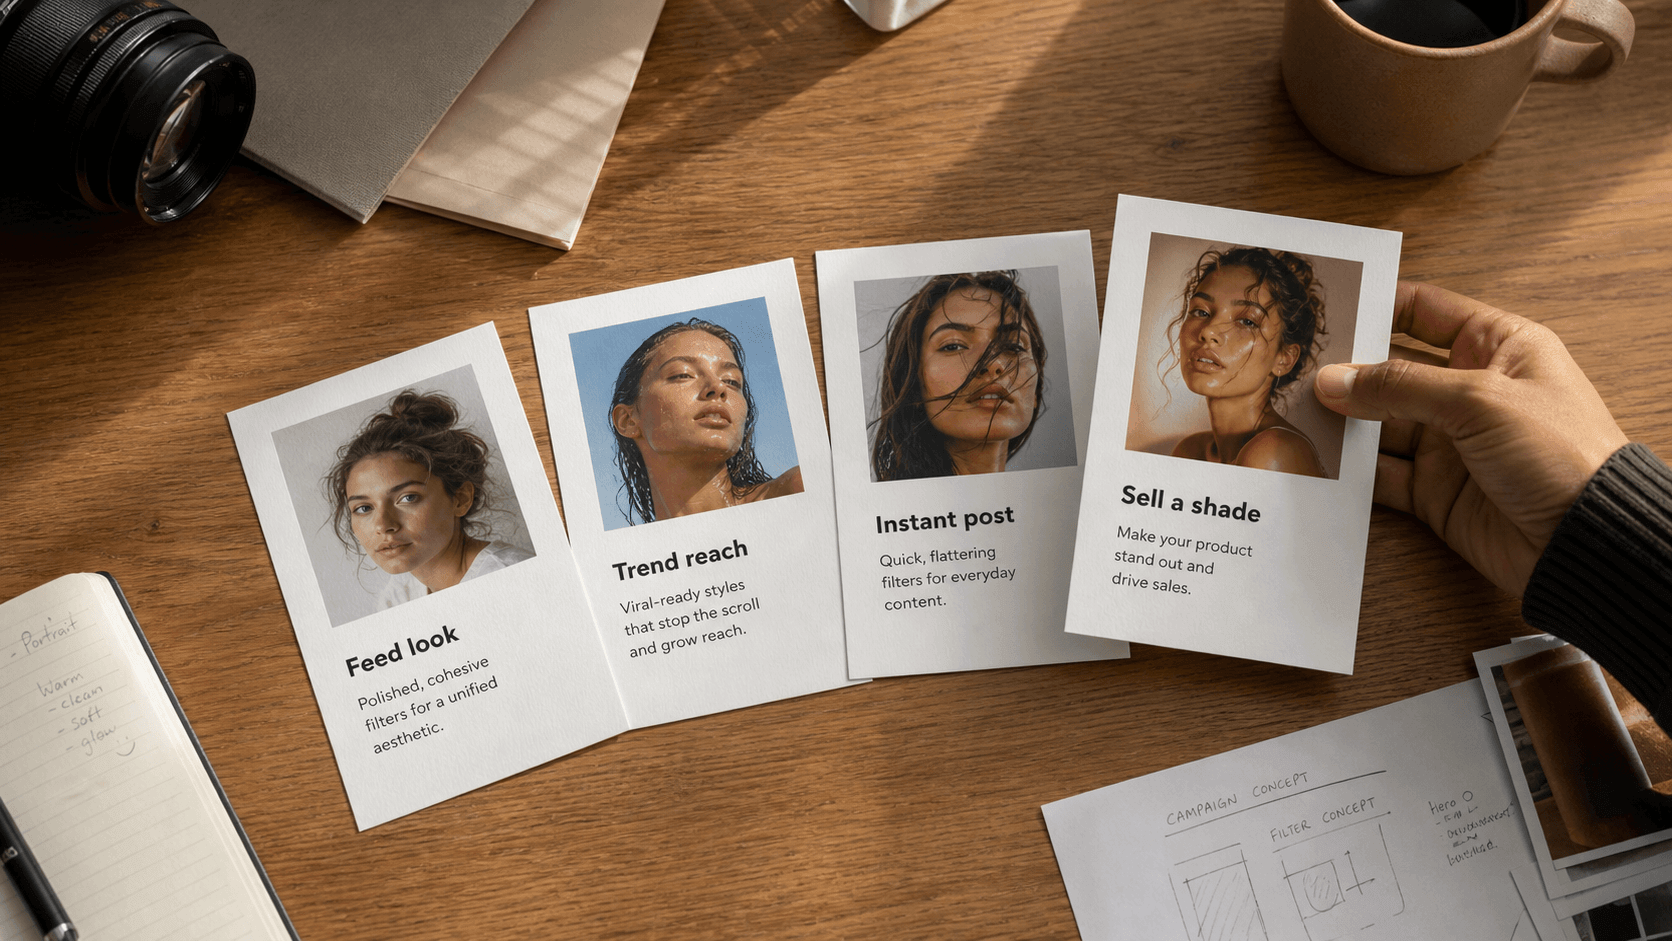
Before opening any tool, answer one question: what is this filter for? Find your goal below and jump to that section.
| Your goal | Make this | Go to |
|---|---|---|
| My photos should all have the same look | A photo preset | Photo filter steps |
| I want strangers to use my effect and find me | A TikTok or Snapchat effect | Routes A & B |
| I just want one great photo today | An AI edit, no filter building needed | No-studio options |
| I want to show a real product shade on a real face | A try-on filter using a beauty API | Route C |
| I'm a brand launching a product | Both: a social effect for buzz + a try-on for sales | Brand section |
The biggest beginner time-waster is picking the wrong tool. A simple photo look doesn't need a weekend in AR software, and a fun TikTok effect can't show a lipstick shade accurately enough to sell it.
Where Can You Build Filters After Meta Spark Shut Down?
Many older tutorials still tell you to open Spark AR Studio and publish to Instagram. That no longer works. Meta announced the end of Meta Spark in August 2024, and on January 14, 2025, the software stopped working and third-party effects were removed from Instagram, Facebook, and Messenger cameras. There is no replacement.
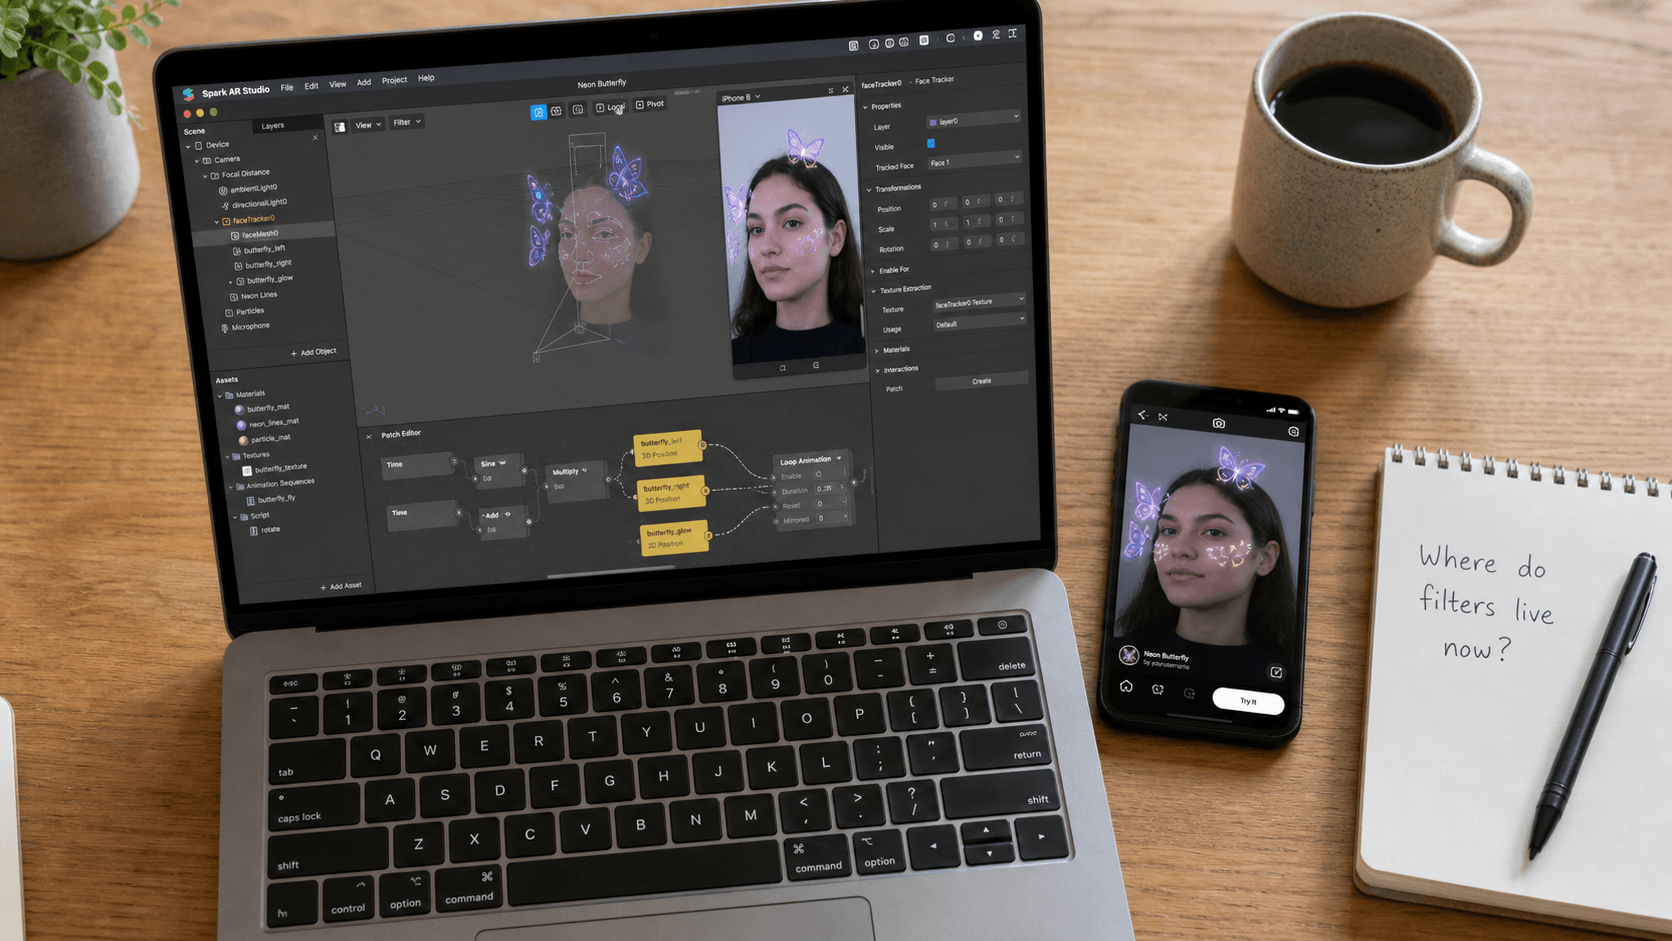
Here's where you can actually publish a filter in 2026:
| Where you want it | Can you publish your own? | Free tool to use | Difficulty |
|---|---|---|---|
| TikTok camera | Yes | Effect House | ⭐⭐ Beginner-friendly templates |
| Snapchat camera | Yes | Lens Studio | ⭐⭐⭐ More features, more to learn |
| Instagram & Facebook camera | No | None | Not possible |
| Instagram posts | Yes, as a preset | Lightroom, CapCut | ⭐ Easiest |
| Your own website or app | Yes, and you own it | Beauty tech API or SDK | ⭐⭐ No-code playground to try; developer to launch |
For creators, TikTok and Snapchat are now the main homes for AR filters. For brands, the shutdown was a warning: a filter that lives on someone else's platform can disappear overnight. A try-on filter on your own product page can't be taken away.
How to Make a Photo Filter (Preset) in 30 Minutes
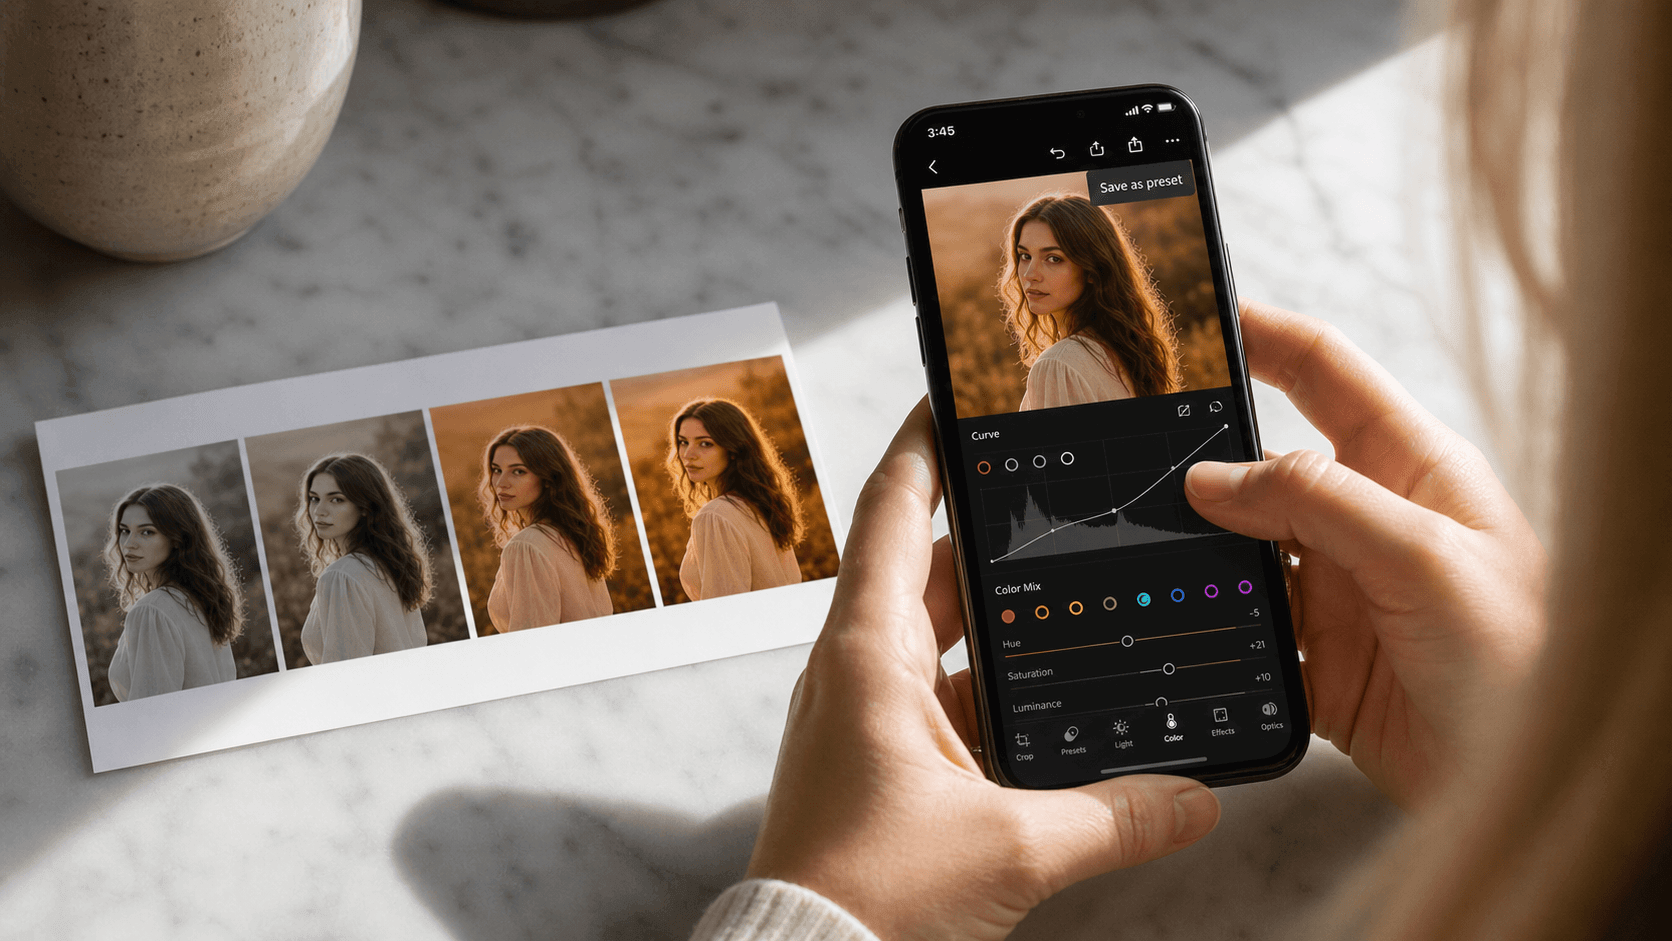
If you just want your own "filter" for Instagram posts, this is the place to start. No coding, no AR, and you can finish today. We'll use the free Adobe Lightroom mobile app; the same ideas work in CapCut, VSCO, or Snapseed.
- Pick one good test photo. Choose a photo that's well lit and typical of what you usually post. Open it in Lightroom and tap Edit.
- Fix the basics first. In the Light panel, adjust Exposure (overall brightness) and Contrast until the photo looks natural. In the Color panel, adjust Temp so white things look white. Don't add your "style" yet; a messy base makes every future photo messy.
- Add the mood with the curve. Open Curve (inside Light). Drag the bottom-left point slightly up for a soft, faded film look. Drag the top-right point slightly down for gentler highlights.
- Add color style. Open Color Grading. Push Shadows toward blue and Highlights toward orange for a cinematic look, or the opposite for a cool, editorial feel. Keep it subtle.
- Protect skin tones. In Color → Mix, select Orange (the main skin color) and lower saturation a little if skin looks too orange. This keeps people looking natural.
- Save it as your filter. Tap the ⋯ menu at the top right → Create Preset, give it a name, and save.
- Test it on 5 different photos. Try indoor, outdoor, daytime, nighttime, and people with different skin tones. If one looks wrong, go back and tone down the strongest setting, then save again.
For video: the same recipe can become a LUT (a color file ending in .cube). Grade one clip in an editor that can export LUTs, such as DaVinci Resolve, then import the .cube file into editors like CapCut desktop to apply the same look to future videos.
How to Make a Makeup Filter: 3 Beginner Routes
A makeup filter is harder than a preset because everyone knows what real makeup looks like, so mistakes show. Pick one route based on where you want people to use it:
- Route A, TikTok (Effect House): best for reach and trends.
- Route B, Snapchat (Lens Studio): best for more detailed effects.
- Route C, your own website or app (YouCam Makeup API): best for showing real product shades. You can try it with zero code first.
Note: Effect House and Lens Studio update often, so button names may differ slightly from what you see. Look for the closest match.
Route A: Make a TikTok Makeup Filter with Effect House
- Download and sign in. Download Effect House (free, Windows or Mac) from TikTok's official Effect House website and log in with your TikTok account.
- Start from a template. Create a new project and choose a face or makeup template instead of a blank project. Templates already have face tracking set up, which is the hardest part for beginners.
- Pick your makeup zones. Start with just lips + one eye product. In the template's makeup settings, choose a color for each zone, or import your own makeup texture (a transparent PNG).
- Lower the strength. Set opacity to around 50–70% to start. Strong makeup on every face looks like a mask.
- Preview on different faces. Use the built-in preview to see the effect on sample faces and videos, then send it to the TikTok app on your phone to test it on your own face.
- Submit for review. Add a name, an icon, and a short demo video, then submit. Approval usually takes days, not minutes. Avoid brand names and promises such as "instant glow" in the name, as these often get rejected.
Route B: Make a Snapchat Makeup Lens with Lens Studio
- Download and sign in. Download Lens Studio (free) from Snap's official site and log in with your Snapchat account.
- Open a face template. Start from one of the face or makeup-style templates so tracking is ready to go.
- Set color and finish per zone. Lens Studio gives you more control over materials, so you can make lips glossy and eyes shimmery. Again, start with two zones.
- Test on your phone. Pair Lens Studio with your Snapchat app to preview the lens live on your own face.
- Publish. Submit the lens for review with a name and preview image, then share its Snapcode or link.
Route C: Make a Real-Shade Try-On Filter with an API (Start with No Code)
Routes A and B make fun effects. If you want to show an actual product shade, like "Lipstick #340," on a real face, use a beauty tech API. The good news: you can try it in your browser before writing any code.
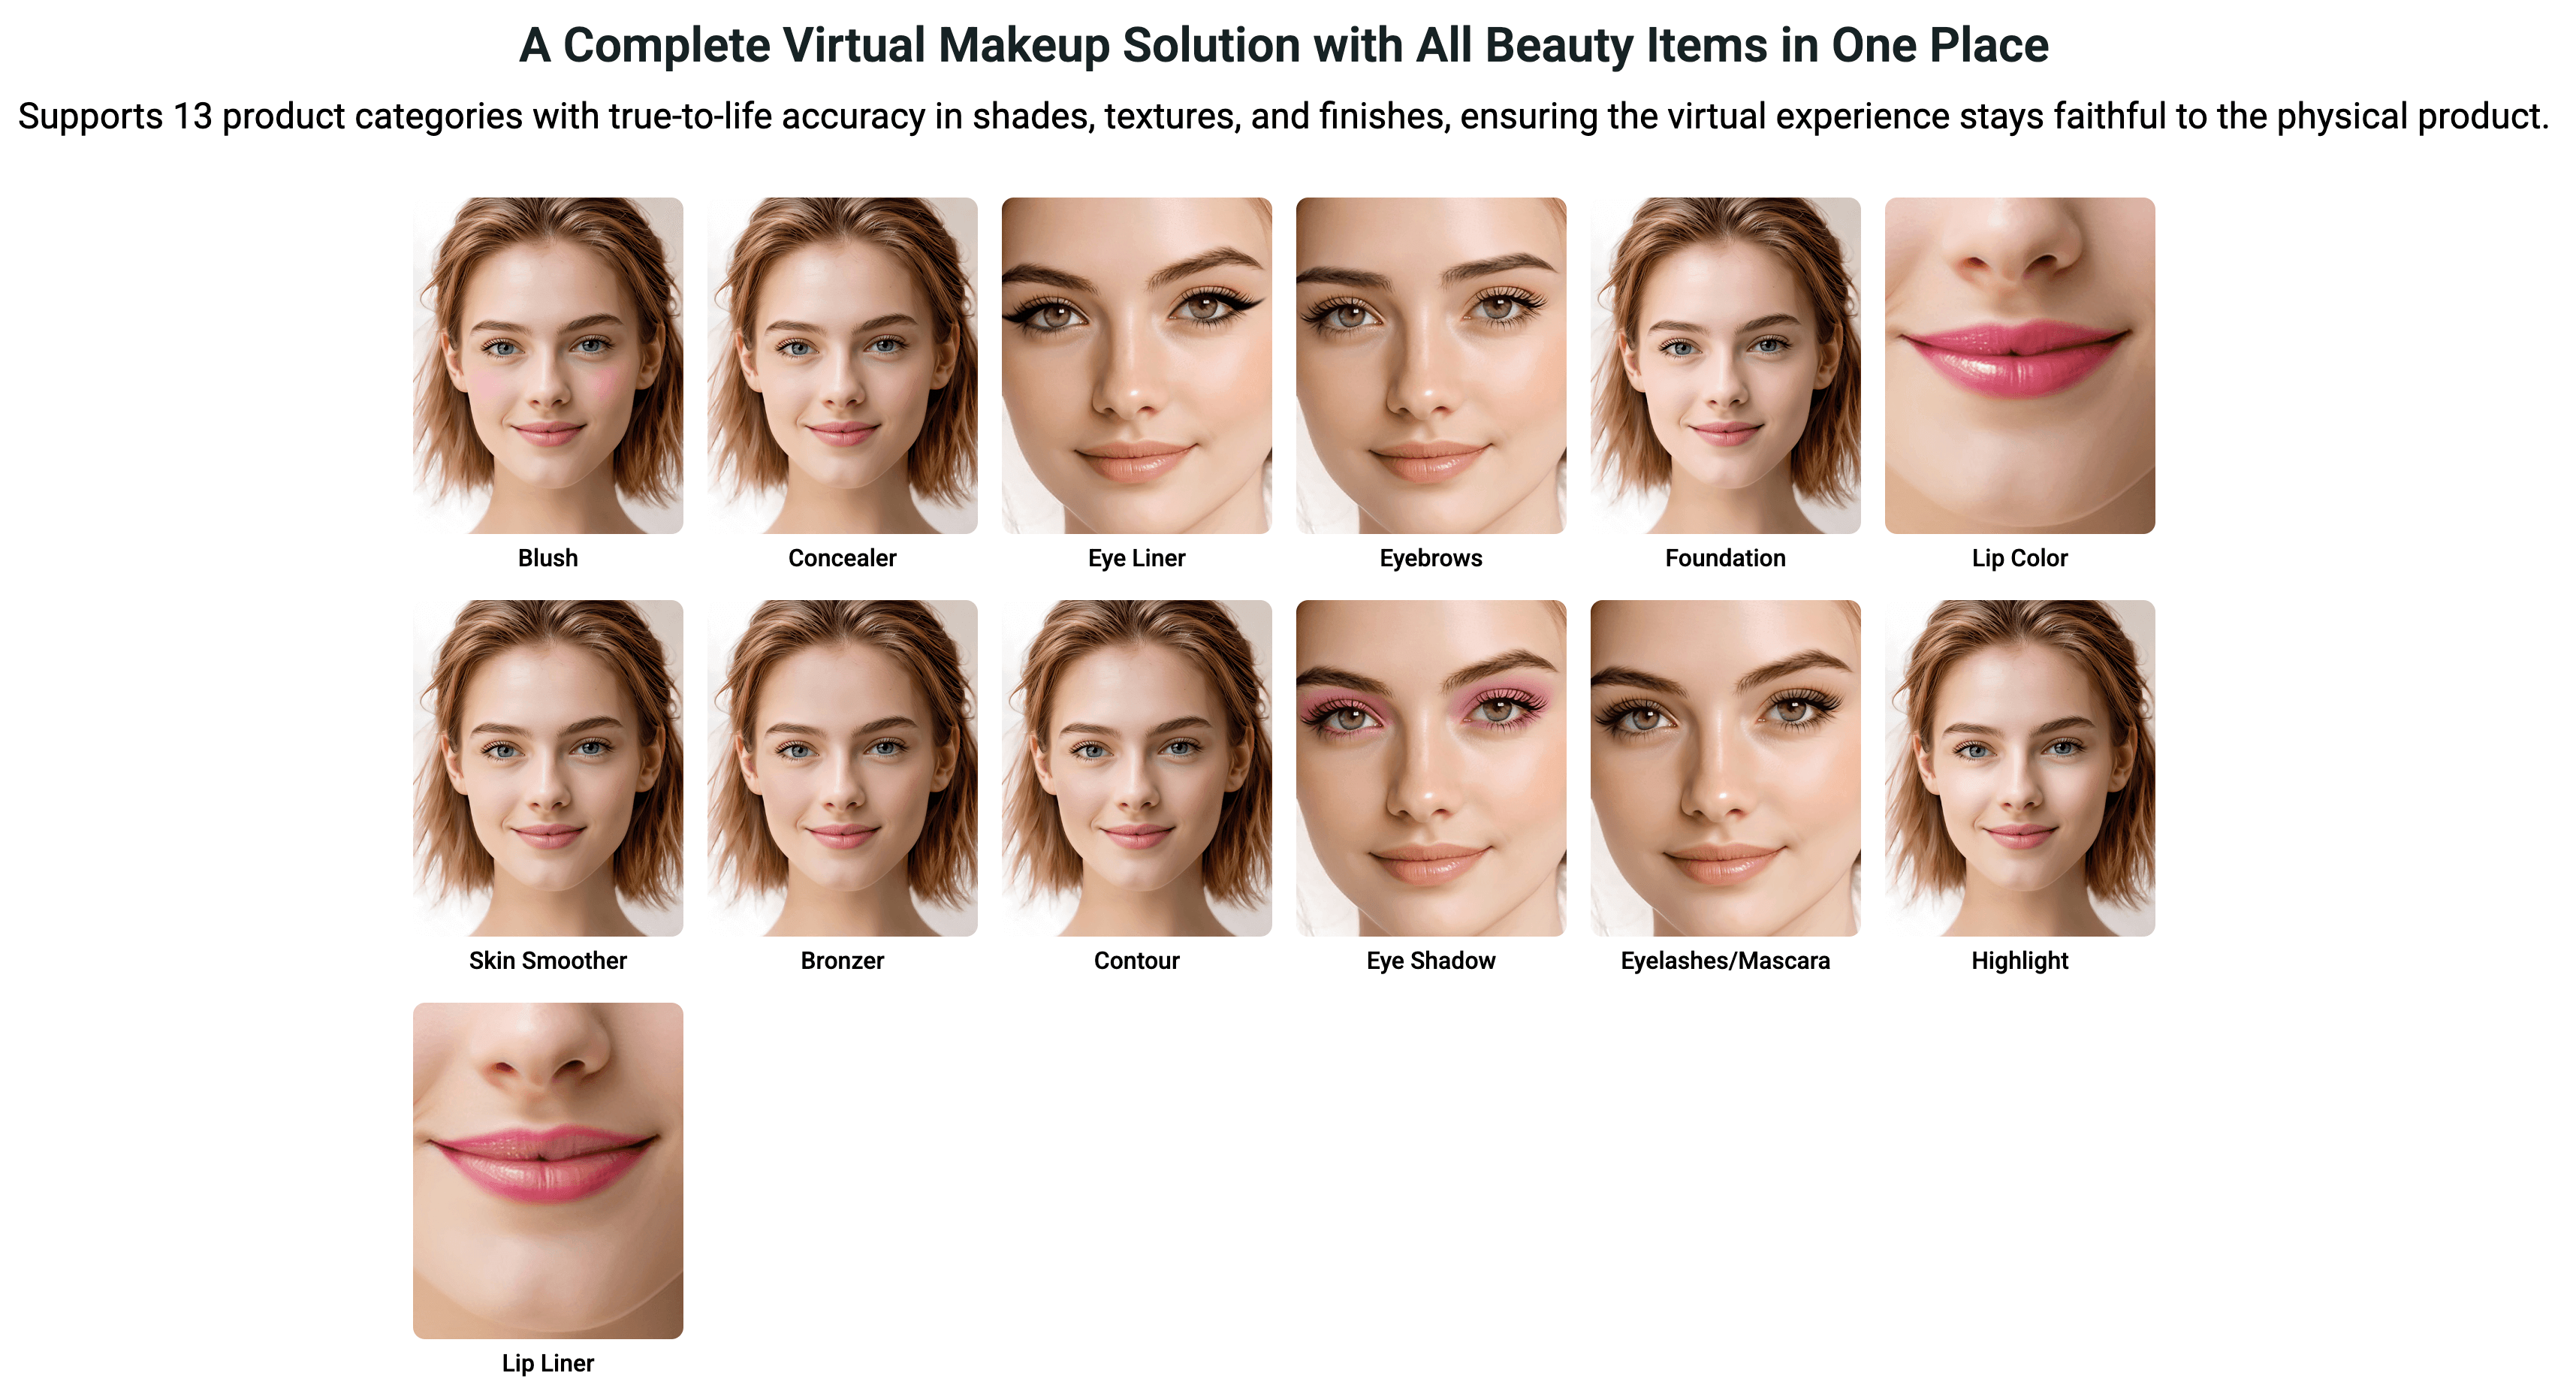
- Open the free playground. Go to the YouCam Makeup Virtual Try-On playground.
- Upload a selfie. Use a clear, front-facing photo in good light.
- Choose a makeup type and color. Pick lipstick, eyeshadow, blush, or another product, then set the color you want.
- Adjust strength and finish. Try matte vs. gloss and lower the intensity until it looks like real makeup.
- Generate and compare. Look at the result next to the real product if you have it. This is your filter.
- Put it on your site when you're ready. A developer can connect the Makeup Virtual Try-On API to your website or app. The flow is simple: upload the photo → send your shade settings → wait for processing → show the result. If you use an AI assistant such as Claude, YouCam API's MCP connection lets you run the same steps just by chatting, which is handy for prototypes.
How to Make a Makeup Filter Look Real
Whichever route you chose, these four rules decide whether your filter looks like makeup or like a cartoon.
1. Decide: Mood or Exact Shade?
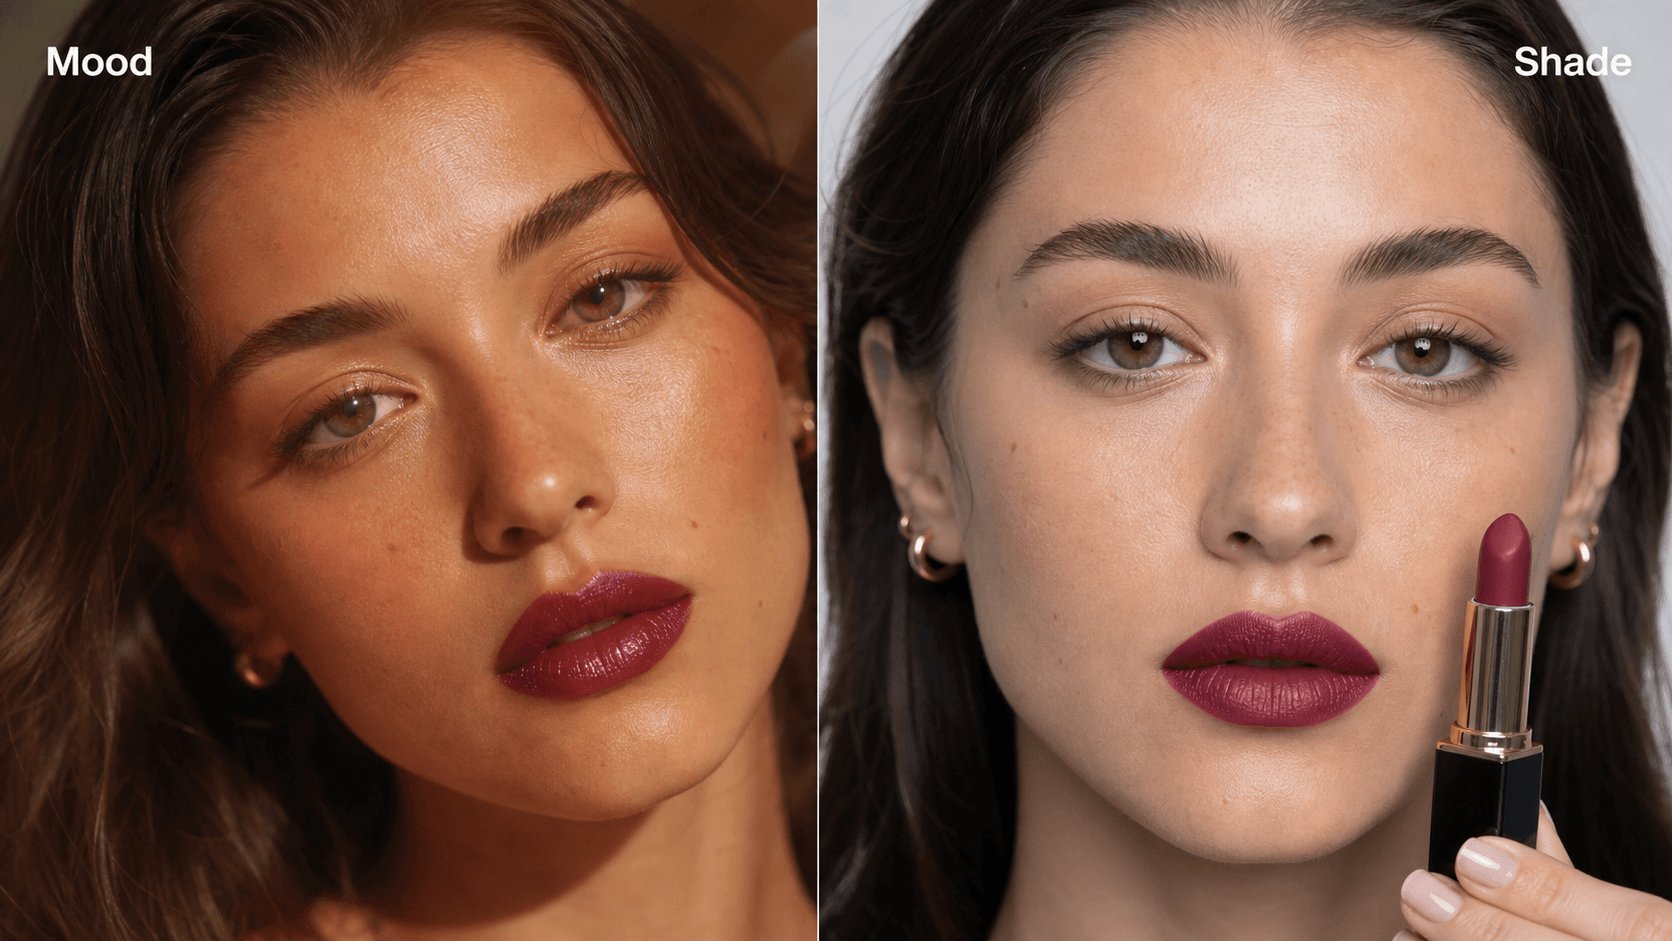
A mood filter (like a "clean girl glow") only needs to look flattering, so you can push warmth and softness freely. A shade filter (like foundation shade 340) must match the real product, because customers will compare it with the tube. Decide which one you're making before you touch any setting.
2. Start with Two Makeup Zones
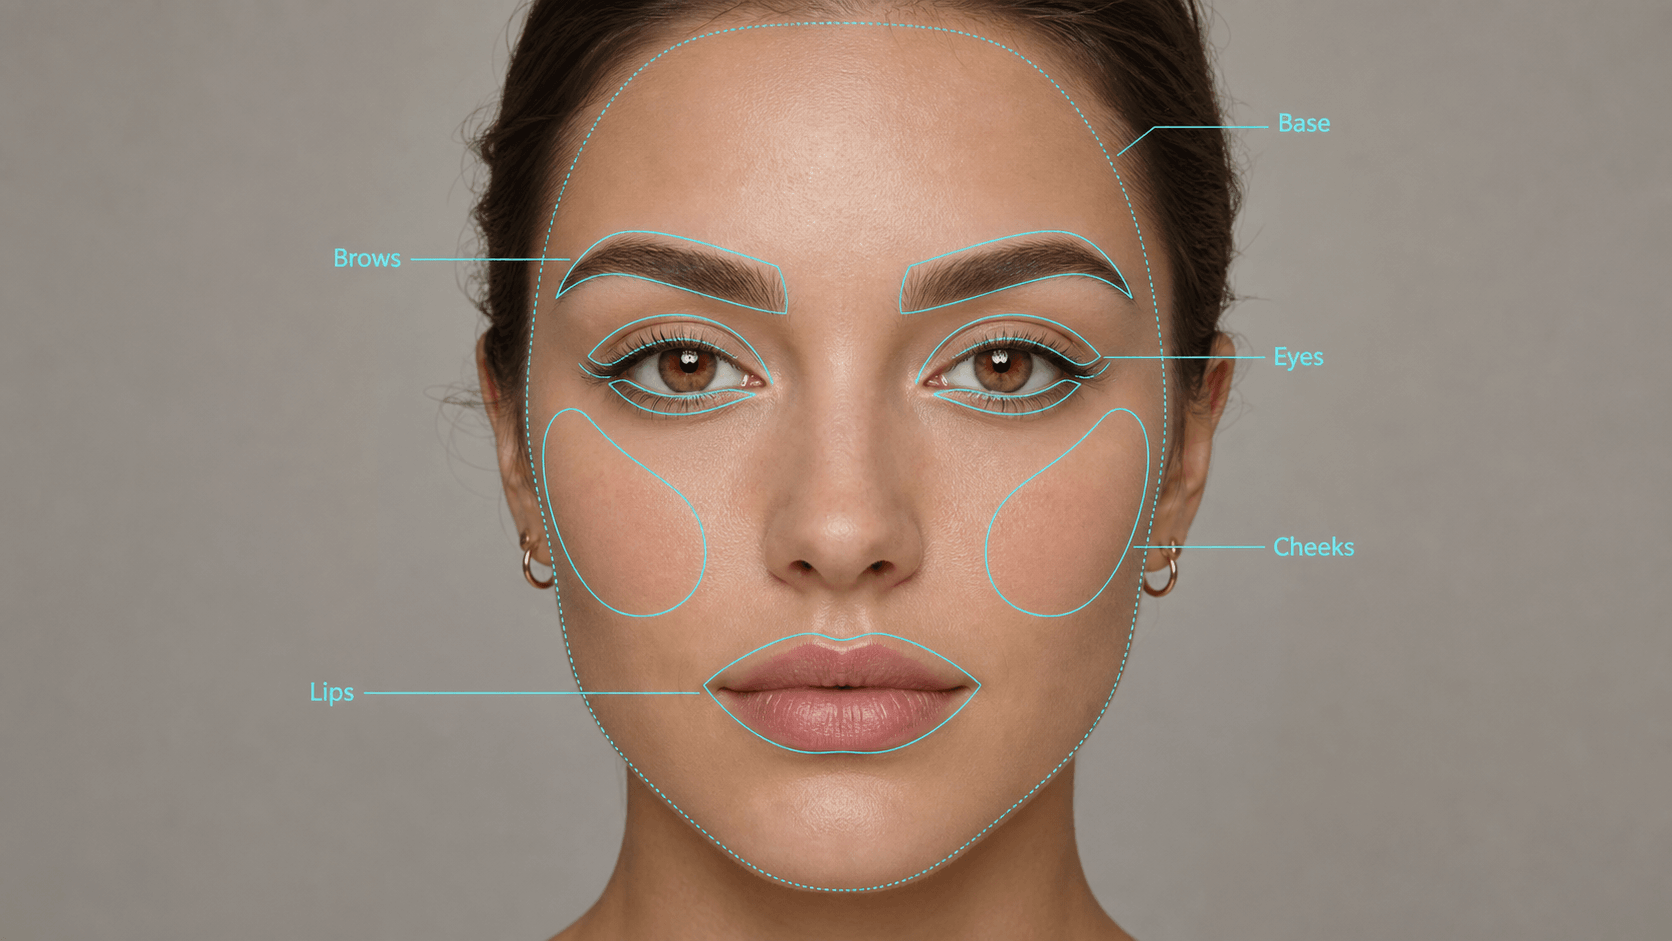
The face is split into zones: base, brows, eyes, cheeks, and lips. Each behaves differently. Lips move constantly, eyelids fold, and cheeks need a soft fade with no hard edge. The tools handle the face detection for you; your job is to choose which zones to use. Lips + one eye product is enough for a polished look. Adding makeup to every zone at once is the fastest way to create a mask.
3. Get the Finish Right, Then Lower the Opacity
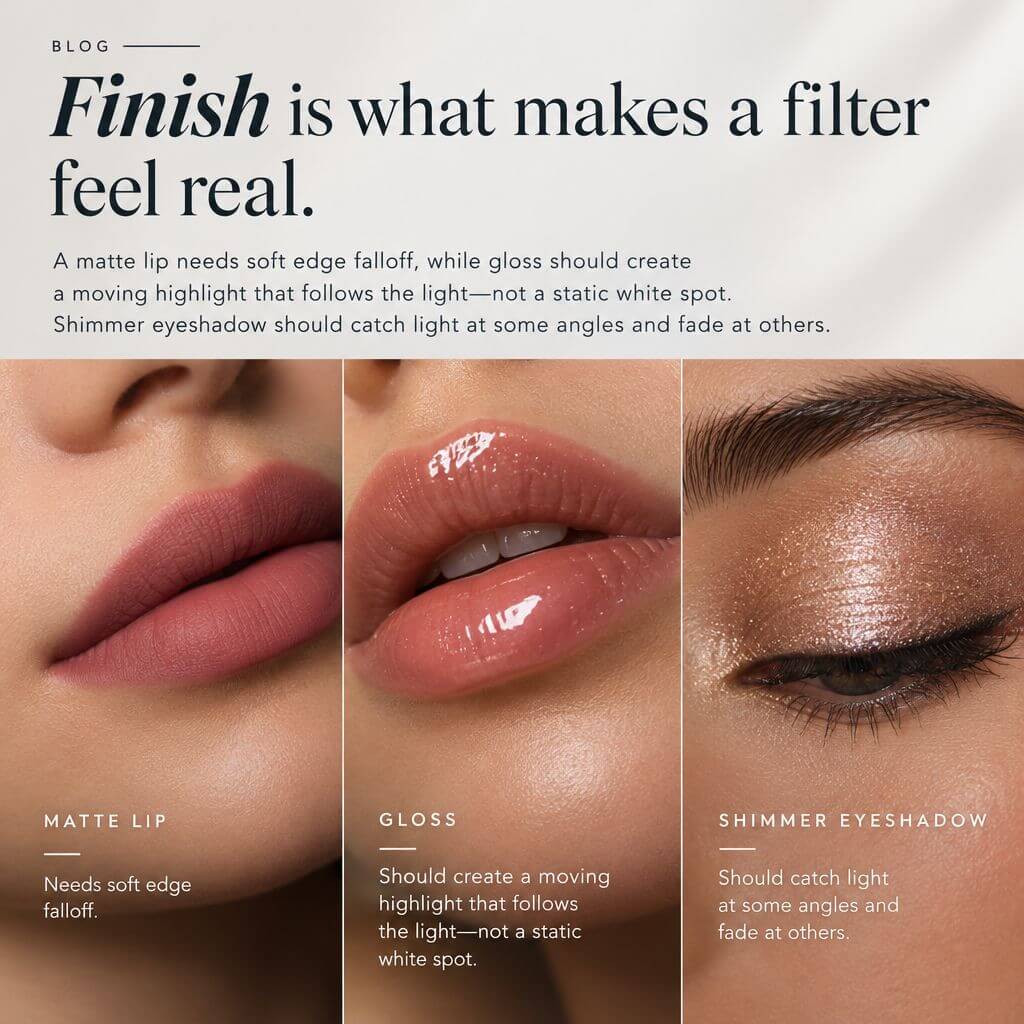
Color is only half the job. Finish makes it believable: matte lips need soft edges, gloss needs a highlight that moves with the light, and shimmer should sparkle only at some angles. If you're unsure, start with satin, the most forgiving finish.
Then lower the opacity. If it looks perfect on your face in good light, it's probably too strong for everyone else in normal light. Drop it by 10–20%.
4. Test on Faces That Don't Look Like Yours
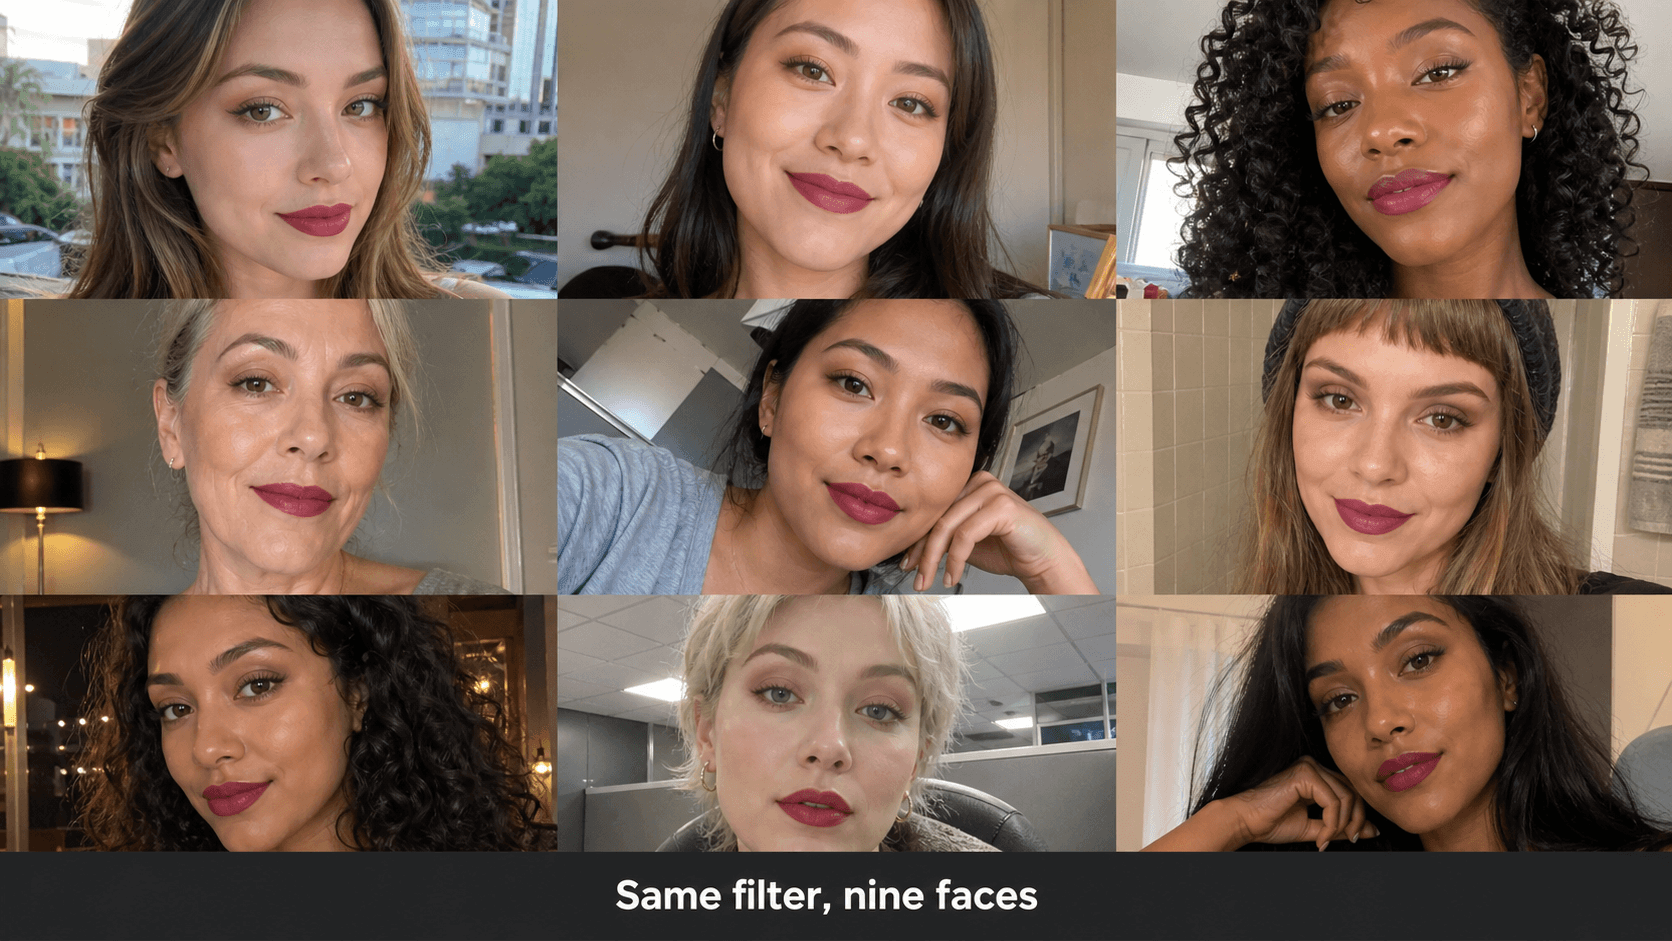
A blush that looks natural on light skin may vanish or turn grey on deeper skin. Try your filter on friends with different skin tones. If one zone keeps failing, change how softly it blends rather than just changing its color. Once it's live, check saves and repeat uses, not just views, to see if people actually like it.
How to Make a Face Filter That Tracks Properly
Fun face filters, like glasses, freckles, or animal ears, are made in the same tools as Routes A and B. What separates a good one from a cheap-looking one is tracking: how well the effect sticks to the face as it moves.
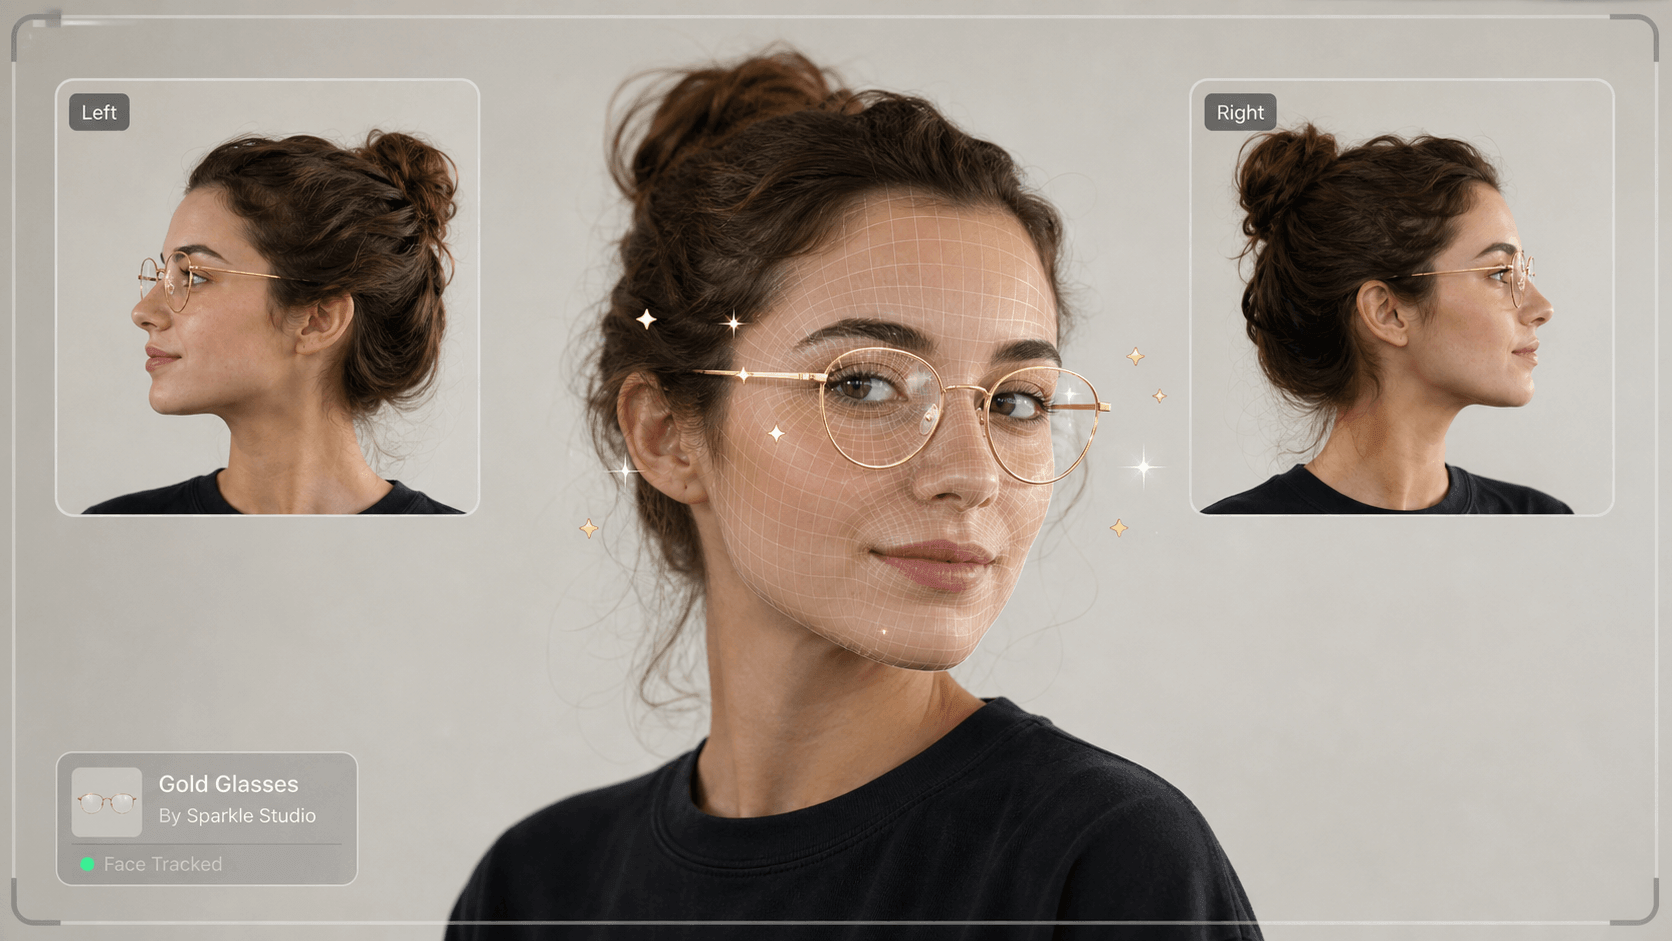
A glasses filter should stay in place from the front and from both sides.
Check these four things before publishing:
- Does it stay put when you turn? Something that looks perfect from the front can slide or stretch when you turn your head. Test side angles, smiles, and talking.
- Does it hide behind the face correctly? When you turn sideways, the far arm of a pair of glasses should disappear behind your head. If it doesn't, the effect looks pasted on. (This is called occlusion.)
- Does it react to the face? Effects that respond to blinking, smiling, or opening your mouth feel more alive and are more fun to share.
- Does it run smoothly on an average phone? Large images and heavy effects make filters lag. Test on an older or mid-range phone, not just the newest one.
Want effects on hair, hands, or the body? Those use different tracking and are harder to get right. A hair color effect, for example, needs a clean hairline so color doesn't spill onto the forehead. Build a quick test before committing to the idea.
How to Make a Filter Without Any Studio Software
Not every filter needs to be built in an AR studio. If you don't need a live camera effect inside TikTok or Snapchat, these options are faster:
- Describe it to AI. AI photo editors let you type a look in plain language, like "soft peach blush and glossy pink lips," and apply it to a photo. You can also connect an AI assistant like Claude to the YouCam API through MCP and ask it to apply makeup to a photo in conversation.
- Build a simple try-on page with no-code tools. Vibe-coding tools like Lovable can generate a basic website with an upload button that sends photos to a makeup API, so you can create a working demo without writing code yourself.
- Use ready-made presets and widgets. Creators can sell preset packs as a product, while brands can add a hosted try-on widget to a product page.
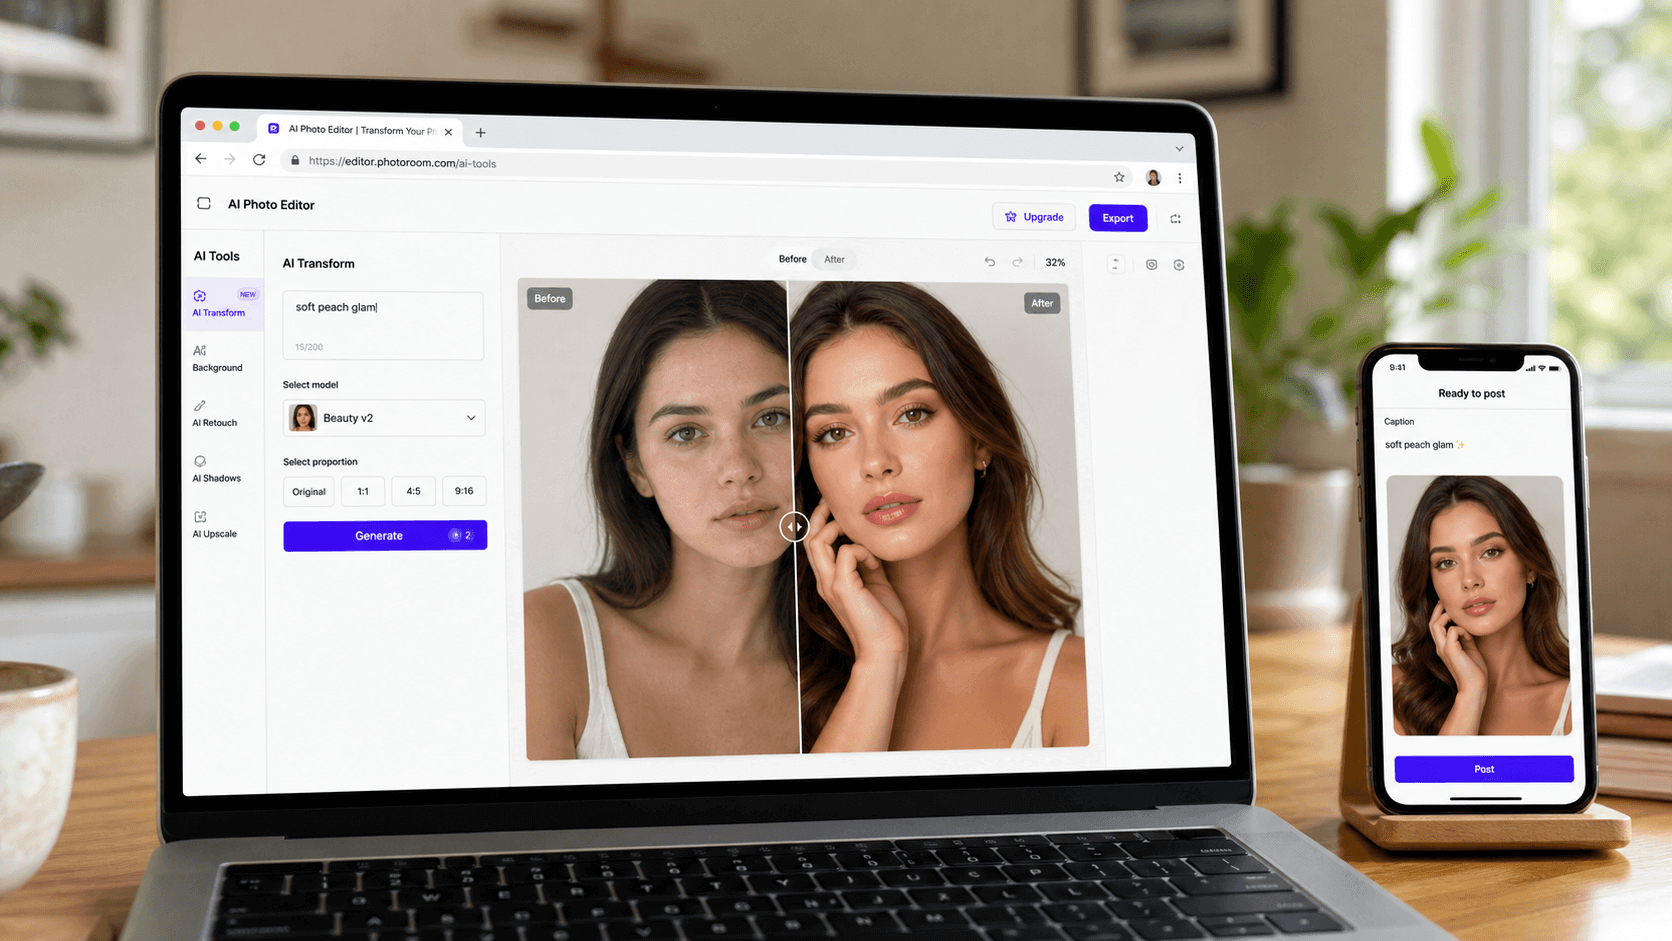
The trade-off: none of these put a filter inside the TikTok or Snapchat camera. For that, you still need Effect House or Lens Studio. But if you just need a great result or a working demo, they're the fastest and simplest path.
Try the AI makeup filter in the API playground to see what you can make before committing to a full build.
How Do Brands Make a Filter for Their Own Website or App?
When a brand wants full control, it builds an owned try-on experience: a filter that lives on its own website or app, stays there permanently, and connects directly to products and checkout.
It's less complicated than it sounds. The work splits into two parts:
- The API handles the technology: finding the face, applying the makeup, and matching color.
- Your team provides the product data: for each product (or SKU, your internal product code), the color, how opaque it is, and its finish.
That product data is what makes or breaks it. If the digital color is wrong, even the best technology can't make the try-on look like the real lipstick.
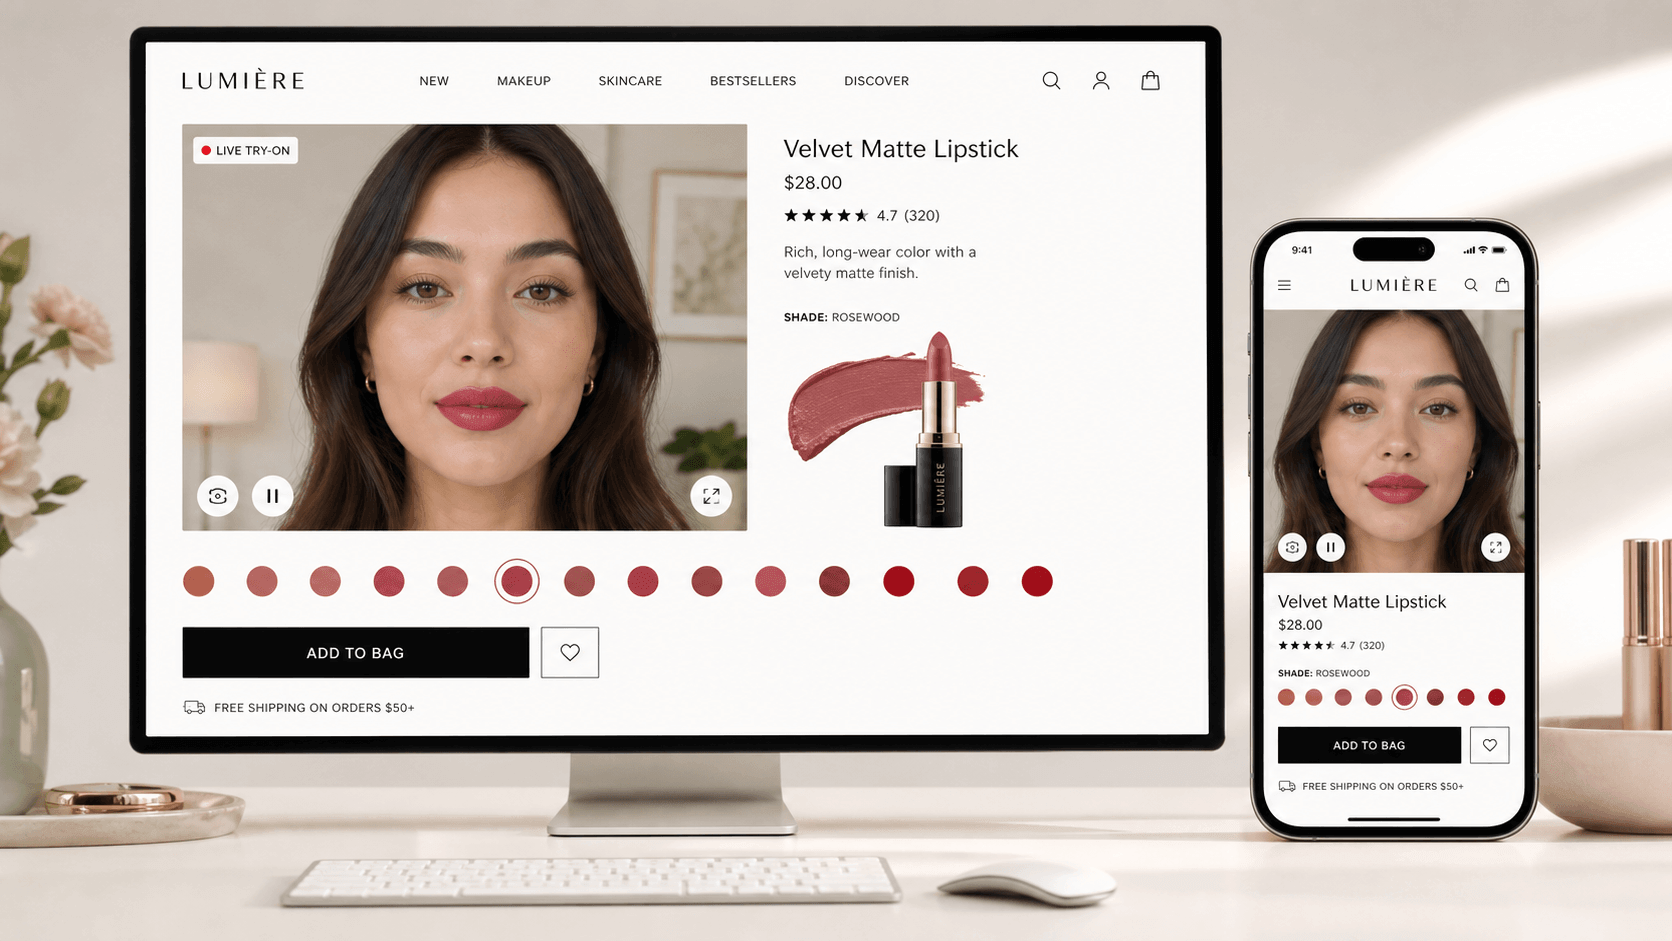
Perfect Corp. works with more than 800 brand partners on beauty technology, so brands can use proven shade calibration and cross-device performance instead of building everything from scratch.
Ready to compare routes? See a live shade finder in action, or explore how virtual try-on fits into an ecommerce stack.
How to Test a Filter So It Works on Every Face
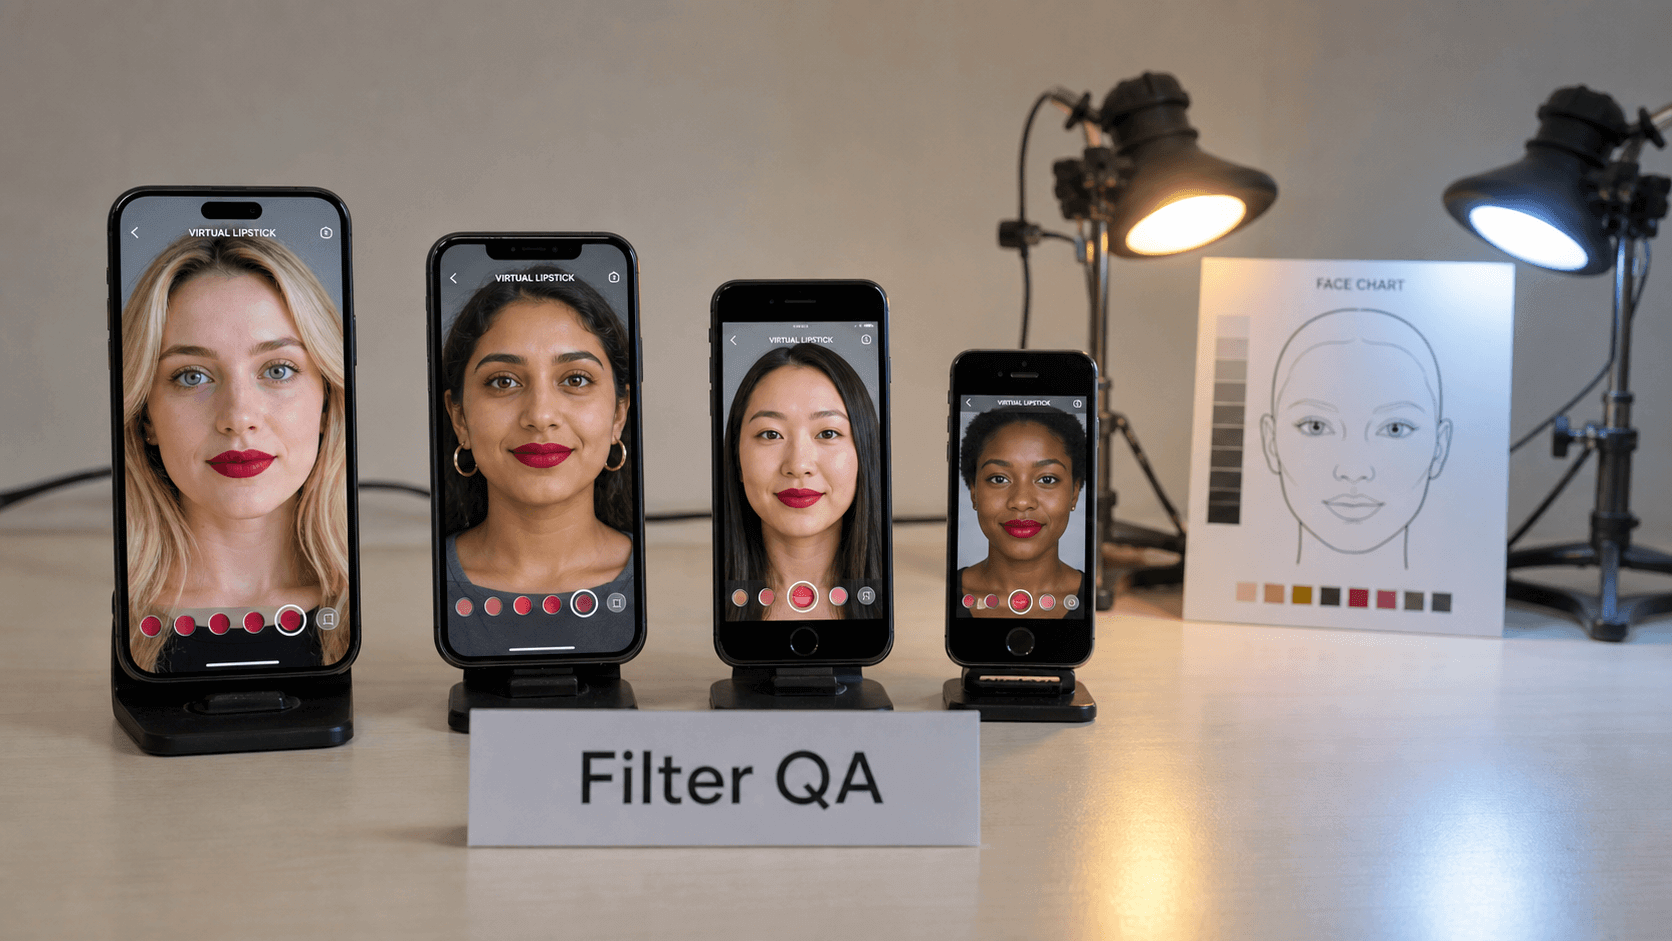
Most beginner filters are tested on one person in one room. Use this simple checklist before you publish:
| Test | What to try | What to look for |
|---|---|---|
| Skin tones | Very light to very deep skin (the Fitzpatrick I–VI scale) | Is the makeup still visible? Does its color change? |
| Lighting | Daylight, warm indoor, office, and dim evening light | Blush and bronzer turning too orange under yellow light |
| Phones & motion | A new and an older phone; talking and turning your head | Lag, sliding, or flickering |
| Tricky cases | Glasses, hands near the face, hair over the cheek, beards, two faces in frame | Makeup appearing on hands or hair, or the effect breaking |
Mark each test pass or fail. If the same test fails twice, the filter needs to be rebuilt in that area, not just tweaked.
Common Beginner Mistakes
- Too much makeup everywhere. Full-face makeup at high strength looks like a mask. Start with two zones.
- Smoothing skin into plastic. Removing all pores and texture looks fake. Always keep some skin texture.
- Testing only on yourself. Try different faces, lighting, and phones.
- Ignoring tracking. An effect that slides or floats ruins even beautiful artwork.
- Making it too heavy. A filter that lags, overheats the phone, or loads slowly won't get used.
- Matching color by eye from a screen. If the filter shows a real product, keep the real product next to your screen while testing.
- Following old tutorials. Guides that mention Spark AR or publishing to Instagram's camera are out of date.
- A name that gets rejected. Brand names and promises like "flawless skin instantly" often fail platform review.
How Much Does It Cost and How Long Does It Take?
Rough estimates for your first filter. Actual time and cost vary with how complex you go.
| Route | Time to first result | Cost | Best for |
|---|---|---|---|
| Photo preset or LUT | 30 minutes to 3 hours | Free to a small app subscription | A consistent look for your feed |
| AI prompt or API playground | Minutes | Free tier to low monthly cost | One-off posts and quick tests |
| TikTok Effect House filter | A few days, plus review time | Free | Reach and trends |
| Snapchat Lens Studio filter | Days to weeks | Free | Richer AR effects on Snapchat |
| Try-on filter on your own site | Days to weeks, depending on integration | Licensed; usually scales with usage | Selling products, accurate shades, owned data |
Two things often take longer than expected: platform review for social filters, and preparing accurate product colors for try-on filters. Plan for both.
What Happens to Filters After 2026?
- You'll describe filters instead of picking them. More tools let people type or say what they want and have AI create it.
- Filters and shopping are merging. Try-on filters now sit right next to product details and the "Add to Cart" button.
- Labeling matters more. Brands may need to clearly say when a filter or retouching is used, especially in ads. Plan for that from the start.
The basics won't change: pick the right type of filter, keep it natural, and test it on many different faces.
Building a filter where accuracy matters as much as looks? Talk to Perfect Corp. about a demo and explore production-ready virtual try-on for your products.
FAQ
Can you still create Instagram filters in 2026?
Not as camera effects. Meta shut down Meta Spark and removed third-party effects on January 14, 2025. You can still make presets, LUTs, and AI edits for your Instagram posts outside the camera.
Is there a replacement for Meta Spark Studio?
Not for Instagram. To publish camera effects, use Effect House for TikTok or Lens Studio for Snapchat. Brands that want try-on on their own site can use a beauty tech API or SDK.
What's the easiest filter for a beginner to make?
A photo preset. In the Lightroom mobile app, edit one photo, then tap ⋯ → Create Preset. You can finish in under an hour with no coding.
How do I make a makeup filter?
Choose where it will live: Effect House for TikTok, Lens Studio for Snapchat, or a makeup API for your own website. Start with lips and one eye product, choose a finish, lower the opacity, and test on different faces and lighting before publishing. To try one with no code, use the makeup try-on playground.
Do I need to know how to code to make a filter?
No. Presets need no coding, and Effect House and Lens Studio offer visual templates. Putting a try-on filter on your own website usually needs a developer, but you can test it in an online playground without code first.
How long does it take to make an AR filter?
A simple TikTok or Snapchat effect can take a few days, plus several days for platform review. A polished effect can take weeks, so start well before your launch date.
How much does it cost to make a filter?
Presets, Effect House, and Lens Studio are free or low-cost. Branded try-on filters on your own site usually involve licensing fees that depend on usage.
What is the difference between a filter, a preset, and an AR effect?
A preset is a saved set of photo edits. An AR effect adds something to a live camera view and follows your face as you move. "Filter" is the everyday word people use for both, as well as AI edits and virtual try-on.
How do I make a filter that works on all skin tones?
Test on a wide range of skin tones from the very beginning, not just at the end. Also test in different lighting, and adjust each makeup zone separately instead of using one setting for the whole face.
Should a brand build a social filter or an owned try-on filter?
It depends on the goal. Social filters build awareness and reach, while owned try-on filters give brands accurate shades, customer data, and a direct path to purchase. Many campaigns use both.



 English


